Sunday, September 30, 2012

Chocolate Chip Cookies

When I don't feel like being creative, but still want to bake, these cookies are what I fall back on. These are seriously the best chocolate chip cookies I've ever made, and I've stopped trying new recipes because they aren't as good as this one. I use Crisco's recipe for Ultimate Chocolate Chip Cookies and follow the directions almost exactly.   

If you're lucky, you'll get the recipe with your Crisco bars.
 
Ingredients:

3/4 cup Crisco® Butter Flavor All-Vegetable Shortening  
1 1/4 cups firmly packed light brown sugar 
2 tablespoons milk  
1 tablespoon vanilla extract  
1 large egg  
1 3/4 cups flour  
1 tsp salt  
3/4 tsp baking soda  
1 cup semi-sweet chocolate chips 

I always make a double batch, which is why there is double the amount of ingredients in the picture. One batch is never enough. I brought some in to where I work, and they were gone in about an hour.

Directions:

1. Preheat oven to 375 F
2. Mix butter, milk, vanilla and brown sugar together until light and fluffy.
3. Add the eggs one at a time, blending until smooth.
Don't try to accidentally use a hard-boiled egg, like I did:
Oops.
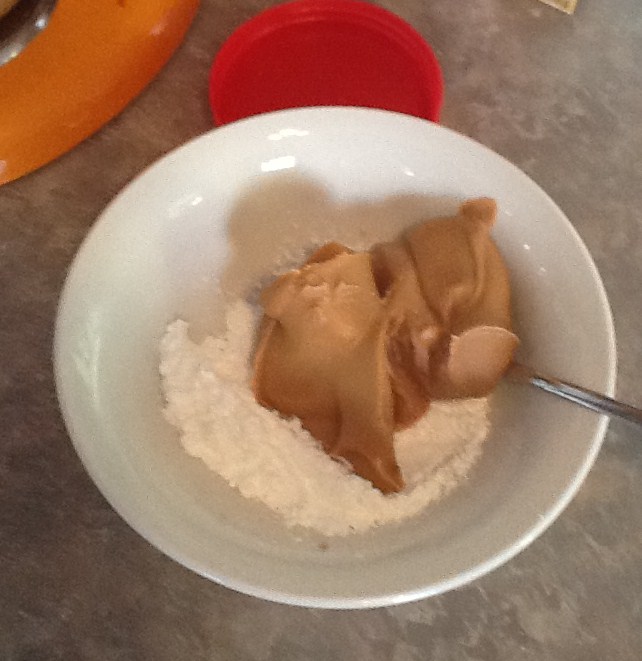
4. Mix in the flour, salt and baking soda. It's easiest to add in the flour a little at a time so that it doesn't go flying across the kitchen. I always add the salt, baking soda and 1/2 cup flour first, then slowly add in the rest of the flour.
5. STIR in the chocolate chips. Don't use your mixer, it will crush the chips into the side. Smooshed chocolate chips are hard to clean off.
6. Place your cookies onto a baking sheet, in whatever size you want. The recipe says rounded tablespoons, so I try and approximate that. I just use my hands though, not an actual tablespoon. 
7. Bake for 9 minutes. I bake my for 7, then rotate them and bake for 2 because my oven is wonky. The 9 minutes should still hold for a working oven though. They won't look at all done, and they'll still be puffy, but take them out anyway. Now, if they still look goopy, then leave them in for a few more minutes. I take my cookies out when they're underdone because I like them chewy. If you like crispy cookies, then leave them in longer.
Puffy cookies
8. Now, don't touch your cookies for 2 minutes after you take them out. They'll continue to bake a little bit on the sheet, but not so much that they get crispy. The cookies will deflate a little and then you can take them off.
Deflated cookies
9. Place your cookies on cooling racks if you have them, but newspaper on the counter top works just fine.

Look at my fancy cooling rack.
And you're done! Try not to eat them all right out of the oven. When I make them at home, probably about half of the batch gets eaten before they're even cooled (or make it into the oven). Hence the always doubling the dough. They are so chewy, with just a little bit of crispy crust, and they're amazing. 

So good

Thursday, September 27, 2012

White Macaroni and Cheese


There are so many recipes for macaroni and cheese around the internet, and I decided to try this one because it claimed to be like Panera's macaroni. I have a serious weakness for Panera. If I could eat there every day, I think I would be completely content.  This recipe...was not my favorite. It tasted fine, just not at all like Panera's macaroni.


White Macaroni
 
Ingredients


1 lb pasta shapes, such as shells
4 tbsp butter
1/3 cup all-purpose flour
1½ cups milk 
1 cup half-and-half
1 tsp salt
1 tsp pepper
2 tsp Dijon mustard
¼ tsp hot sauce
4 oz white American cheese (or 6 slices)
8 oz white cheddar cheese

Do you know how hard it is to find white American cheese where I am? Very hard. The only thing I could find was the slices, so that's what I used. 


Directions:

1. Shred your cheeses. It's easier to do this at the beginning than trying to do it while whisking away later.


2. Cook your pasta according to the directions and drain. If I'm doing two things at once, I always have to set a timer for 8 minutes to remind myself to check my pasta.

Fun Fact: Placing a wooden spoon over your pot keeps it from boiling over. Usually.
 3. In a medium saucepan over medium-high heat, melt the butter.


4. Whisking constantly, add the flour into the butter and cook for 1-2 minutes until it turns a light brown.


Light brown color

5. Slowly whisk in the milk and keep whisking until there are no flour lumps left. I check by tilting the pan a little and making sure there aren't any lumps on the bottom.

Lump free!

6. Add in the salt, mustard, and hot sauce.  Lower the heat to medium and continue to cook until the sauce bubbles and thickens, about 6-8 minutes.  

Bubbly and thick
 7. Remove the sauce from the heat and stir in the cheese a little at a time, making sure it is fully melted before you add more. I did a hand full of cheddar, then two slices of American, then continued until there was no more cheese left.  

First cheddar....
...then American
8. Once all the cheese is added and melted, add the sauce to the pasta. Mix well until the pasta is fully coated in the sauce.
Smooth and creamy cheese sauce
9. Combine the sauce and noodles together and you're done!

Sure looks yummy, doesn't it?


This recipe ended up being very mustardy, and not very cheesy tasting at all. It didn't necessarily taste bad. It just didn't taste at all like I expected, so it was disappointing. Hence why I ended up doing this:
More cheese!
This recipe has potential to be good. I'd definitely cut way down on the mustard, and maybe even cut it out completely. The American cheese also didn't seem to add any flavor. I think this would be amazing with some Gouda cheese with the cheddar. I plan on trying this again and seeing if it can be saved sometime. Overall, the idea behind this recipe was good, but the flavor just wasn't what I wanted it to be.

Thursday, September 20, 2012

Tomato Tortellini Soup

As the weather gets chillier around here, I'm craving more soup. That's a lie, I've been craving soup since mid-July, but now it's more appropriate to make it. I get home later on Wednesdays from work, and this soup was a great quick and easy meal.


I got most of the recipe for Taste Of Home and made some changes to make it work for me. I used less half-and-half cream, because two cups is a lot of that. It was still plenty creamy. I also didn't include the sun-dried tomatoes and added red pepper flakes instead.

Ingredients:


 1 package (9 ounces) refrigerated cheese tortellini 
2 cans (10 ounces each) tomato soup
2 cups chicken broth 
2 cups 2% milk 
1 cup half-and-half cream 
1 tsp red pepper flakes
1 tsp garlic powder 
1 tsp dried oregano
1/2 tsp salt
1 tsp pepper 
1/2 cup shredded Parmesan cheese

 
Directions: 

1. Boil your tortellini according to instructions. You could also easily use ravioli for this as well.
Tortellini looks like snails.
2. Heat up the tomato soup, chicken broth, milk, half-and-half, red pepper flakes, garlic powder, oregano, salt and pepper. in a large pot. So basically everything except for the cheese.
Heating up the soup

3. Add the tortellini to the soup once it's hot and the tortellini are done. I used cheese tortellini, and I personally thought they were a little bland. I might try the kind with Prosciutto in them next time to add more flavor.
4. Add the Parmesan cheese to the warm soup and serve. Feel free to sprinkle extra Parmesan over the top as well.

Yum! Soup for two

I loved this recipe. It was super easy to make and tasted excellent. I even took some more in my lunch the next day, and it reheated very well. I will definitely be making this again.

Tuesday, September 18, 2012

Cake Batter Popcorn

I found multiples of this Cake Batter Popcorn recipe floating around Pinterest and based my recipe off of two or three of them combined. I was meeting some friends for a night of snacks and watching Revenge, and wanted something sweet and easy to make. This fit the bill perfectly.

Ingredients:

9 cups of popcorn
1+1/2 cups of white chocolate chips
1/4 cups of vegetable oil
1+1/2 cups of cake mix (white or yellow)
Salt
Sprinkles


Directions:

1. Pop your popcorn: 9 cups or about two bags of microwave popcorn.
Lots of popcorn!

2. Melt the white chocolate in the microwave or double boiler. Be careful not to overheat it. I used the microwave and did it in three 20-second intervals.
3. Mix the vegetable oil into the melted chocolate, then add the cake mix. I used Funfetti, because it's the best. It will wind up being quite thick, but still mixable.

It should look like this.
4. Combine the popcorn and cake/chocolate mix. I ended up having to split the popcorn and mix in half, and use two bowls. It's very hard to mix a full bowl of popcorn without it all ending up on the floor.

Two bowls!
5. None of the recipes online had salt, but the mixture was very, very sweet to me. I mixed some sprinkles together with some salt, and added it to the popcorn for color and and to balance out the flavor.
6. Spread the popcorn out on a baking sheet and add more sprinkles on top. Then place the popcorn in the refrigerator to harden up.


I put the popcorn back into the bowl for a pretty presentation, and easier transport to girls night. I recommend keeping it in the refrigerator, or the chocolate gets a little melty. It is also still very sweet, but still very good.
Pretty and very sweet. Perfect for girls night.

Monday, September 17, 2012

Peanut Butter Brownies

Today it was raining out, and very dreary. Obviously, a great day for baking. However, I was feeling kind of lazy and didn't want to make anything from scratch. After a quick perusing through my kitchen cupboards, I settled on brownies. I obviously can't bring plain old box brownies though. So now what?

It's like magic.

Peanut Butter. That's what. Chris has a love of all things peanut butter and chocolate (except no-bake cookies, that weirdo). So I whipped up some peanut butter swirled brownies. Easy and fast and very tasty!

Ingredients:

Any box brownie mix, or if you have more time, make some homemade ones.
Whatever ingredients your mix requires (usually water, oil and eggs)
 3 tbs peanut butter
1 tbs powdered sugar

Directions:

1. Prepare your brownie mix according to the instructions and pour into a 9x9 in pan.

Brownies!

2. Put 1 tablespoon of powdered sugar and 3 tablespoons of peanut butter in a small bowl and mix them together.

Pre-mixed peanut butter

3.  Dollop the peanut butter mixture into the brownie pan.

Dolloped peanut butter is not very pretty.

4. Swirl the peanut butter throughout the brownies with a spoon or knife. I swirled mine a little too much, which is why it looks so mixed in. Next time I'm going to try to swirl less so there are more pronounced peanut butter parts.


5. Bake according to the brownie directions, and enjoy!

End result: Tasty brownie treats!


Saturday, September 15, 2012

Chocolate Chip Cookie Cake


I can't think of a better way to start off my blog than with a birthday cake. My darling husband turned 24 last week, and as always, I baked him a cookie cake.

I meant for the Birthday to climb up the side like that.


These are his absolute favorites, and while they aren't the most exciting thing to bake, they are always delicious. I make these for his birthdays, special occasions and when he's stressed. His family always buys store-bought cookie cakes for special occasions and I think next time I'm going to offer to bake one. Those things are gross.

Moving on...since I've been making these for the past two years, I've gotten the recipe down pretty well. However, we did just move in to a new apartment and the oven...is odd. I'm still getting used to the temperature variations in it. So this cake is a little browner than I would like it to be, but still tasty.

This is the original recipe that I base everything off: http://allrecipes.com/recipe/giant-chocolate-chip-cookie/
However, I've had to make a few tweaks and changes to get the cake to how I like it. Because who likes walnuts in their cookie cakes? No one, that's who.

Here is how I make them

Ingredients:

Butter not included, because it was in the microwave. I also forgot the eggs. It's my first post. Sorry.


1 cup butter, softened
3/4 cup white sugar
3/4 cup packed brown sugar
1 1/2 teaspoon vanilla extract
2 eggs
2 tablespoons milk
2 1/4 cups all-purpose flour
1 teaspoon salt
1 teaspoon baking soda
2 cups semisweet chocolate chips
Directions:

1. Preheat your oven to 375 F and lightly grease a 14 in round pizza pan. 
2. If you're like me, you don't soften your butter ahead of time because that requires advance planning. Go ahead and soften those sticks up in the microwave. The best way I've found to do it is 7 seconds at a time, turning the butter each interval.
3. Beat together your newly softened butter and the sugars in a bowl until light and fluffy. I use my stand mixer, but you can do it by hand as well and get in some arm exercise.
4. Add the eggs, vanilla and milk to the batter. It's going to be very soupy now, much more so than when you make just regular chocolate chip cookies.
5. Mix in the salt, baking soda and half the flour, gradually adding in the rest of the flour until it is all incorporated. It will be lighter and stickier than regular cookie dough because of the extra milk.
 
This is what the consistency should look like once it's all mixed together.

6. Stir in the the chocolate chips by hand, unless you want to scrap chocolate chip chunks off of the bottom of your stand mixer.
Your end result.
7. Place some of the dough in the middle of your pizza pan.
I have no counter space, hence doing this on the stove.

8. Spread the dough out towards the edges, adding more dough as needed. Make sure to leave about 1-2 inches around the edge of your pan to leave room for the cookie to spread. You will not use all of the dough.

Like this!

9. Make sure to build the dough up higher around the outside so that it spreads easier and doesn't burn.
Hopefully you can tell that the outside is a little higher than the center.
10. Bake for 20-25 minutes, depending on your oven. I baked mine for 25, because the back of my oven gets much hotter than the front, and I forgot to rotate it so I had to use the extra time to make sure it was all cooked. That's when the milk comes in handy for keeping the cookie soft. It's a little more brown that I usually like and a little crispier around the edges, but those are about the only differences.
11. Now...there's the matter of that leftover dough. You can bake it into cookies, but they will be thin and crispy. Not necessarily bad, just not my style of cookie. Or...you can not bake it and do with it what you want. I'm not going to tell you which one I did.
There's about a cup leftover.
Enough for about 6 cookies. Bake for 8-10 minutes at 375. If you want.

12. Now comes the fun part. Frosting! I asked my husband what kind of frosting he wanted, and he said "The white kind". Which means this kind:
Yummy chemical goodness
Canned frosting. Something about it with cookie cake is just so right. And only the white flavor, not the vanilla. If you're feeling really fancy, you can do a combination of chocolate and white, like they do at the stores. I have yet to try any other frostings with cookie cake, just because I don't know if it would compare. But feel free to venture out into the world of homemade frosting. I'd love to know what tastes good with this cake.


The Final Product:


Hopefully your sense of spacing is a little better than mine, and you can manage to center your words. Now there's nothing left to do but stick some candles in it and slice it up! Happy 24th Birthday!